It isn't a National holiday yet but this month The Cornish pasty has become a protected food following a long campaign to prevent it being copied by imitators.
Only pasties prepared in Cornwall and following the traditional recipe can now be described as Cornish after the European Commission awarded the dish "protected geographical indication" status. Authentic pasties can still be finally baked elsewhere in Britain.
On my last trip to England I introduced Cornish Pasties to an American. Of course, I grew up on them but it is an acquired taste. It is a carbohydrate dream, pastry filled with meat and potatoes!
The visit to Convent Garden included a drooling stop at The West Cornwall Pasty company.
A Cornish Pasty ( pronounced Pastie) is associated with Cornwall, which is the western tip of England and one of my favorite places to visit.
It has been said that the Pasty was first made to meet the needs of men working in tin mines. The traditional filling of meat, potatoes, onion and turnip provided a nutritious lunch for the hard-working miners in the damp and gloomy tunnels. So firmly was the filling encased in the pastry, the pasties were still warm when lunch time came around. It was also very practical as it was easy to carry in one hand.
Nobody knows exactly when pasties originated, but there's a letter in existence from a baker to Henry VIII's third wife, Jane Seymour (1510-1537) saying '...hope this pasty reaches you in better condition than the last one...'
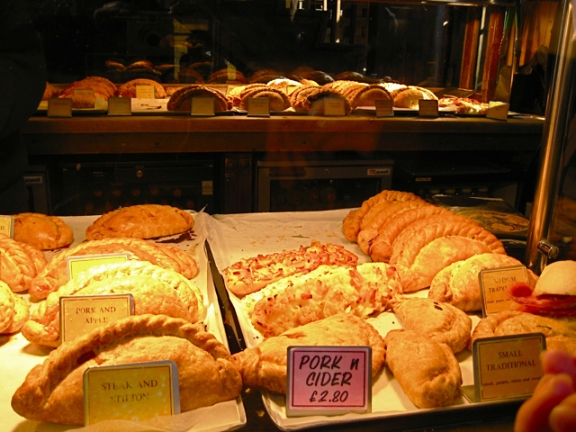
As well as being one of Cornwall's most successful food exports, the Cornish pasty is also an essential part of the holiday experience for 3.5 million tourists a year. Today the Pasty has evolved into many different fillings and recipes.
This is a sample of the selection in a Pasty Store, Steak and Stilton is delicious!
Take a look at the the store website:-
Cornish Pasty traditional recipe
Ingredients
Pastry:
- 2 1/4 cups all-purpose flour
- 1 teaspoon salt
- 3 ounces cold, unsalted butter, cut into pieces
- 4 ounces lard or vegetable shortening, cut into pieces
- 1 egg yolk
- 6 tablespoons cold water
For the Filling:
- 10 ounces chuck steak, trimmed and cut into scant 1/4-inch dice
- 1 small onion, very finely chopped
- 1 medium carrot, cut into 1/4-inch dice
- 1 small potato ( I like Yukon), cut into 1/4-inch dice
- 1 1/2 teaspoons salt
- 3/4 teaspoon freshly ground black pepper
- 1 egg, lightly beaten
For the pastry:
Directions
Sift the flour and salt into a mixing bowl and add the butter and lard. Using your fingers, 2 knives, or a
pastry blender, cut the butter and lard into the dry ingredients until mixture resembles fine crumbs. In a small bowl,
whisk the egg yolk and water together and add to the flour mixture. Mix quickly, but thoroughly, until mixture just comes together to form a dough. Knead briefly until pastry is smooth with no cracks; the trick to making this delicate pastry easy to work with is kneading it just enough so that it can be rolled out and manipulated without breaking but yet retains its lovely crumbly texture. Press into a flattened disk shape and wrap in plastic. Refrigerate for at least 30 minutes and up to overnight before proceeding.
Remove the pastry from the refrigerator and unwrap. Allow to soften slightly, then place on a lightly floured work surface and roll the pastry to a thickness of 1/4-inch. Using a small plate or saucer as a guide, cut out 6 (6-inch) rounds. (Scraps may be combined and reformed if you cannot get 6 rounds out of the first batch.) Stack the pastry rounds onto pieces of plastic wrap or parchment paper (with pieces between each round to keep them from sticking together) and refrigerate while you prepare the filling.
For the filling:
Preheat the oven to 400 degrees F.
Remove the pastry circles from the refrigerator. In a mixing bowl, combine the meat,
onion, carrot, potato, salt and pepper and mix until thoroughly combined. Place the pastry circles on a clean work surface and place about 1/2 cup of the filling in the center of 1 side of the pastry. Using the beaten egg, brush the edges of the pastry and then bring the unfilled side over the filled side so that edges meet. Press edges together to seal and then crimp using your fingers or a fork. Repeat with the remaining turnovers and then transfer to a baking sheet. Brush the tops of the turnovers with the remaining egg and then cut several slits into the top of each pastry. Bake for 20 minutes, or until pastry is golden brown around the edges. Reduce the heat to 350 degrees F and continue to bake until the pasties are golden brown. Remove from the oven and allow to cool for 10 to 15 minutes before serving.


No comments:
Post a Comment